How to integrate Clerk with your React App (Part #1)

I'm a software engineer with capabilities for doing application design and software development with several technologies and frameworks. I’m a friendly, organized, responsible person, always focused on achieving the best results, I have clear goals and a great determination to overcome any obstacle that may arise. Always excited about learning and working with newer technologies and methodologies that allow me to create better software solutions and grow professionally.
During the development of any project, one of the most important features is the authorization and authentication of the users, due that we need to guarantee security in that process for our users. In that field, there are several topics, frameworks, and technologies that can be used. Today we will take a look at Clerk that is an awesome tool for our projects.
What is Clerk?

Clerk is a tool that allows you to add sign-up, sign-in, and profile management to your application in minutes. Theme prebuilt frontends to match your branding, or customize everything with easy-to-use APIs. Clerk provides several awesome features as
- 2-step verification: Encourage or require a second step during sign-in.
- Single sign-on: Grant faster access with Google, Facebook, and more.
- Available passwordless sign-in: Make passwords obsolete by sending one-time password codes.
- Multi-session: Allow users to sign in to multiple accounts at once.
- New device notifications: Proactively notify users when a new device signs in.
- Password breach notifications: Proactively reset passwords that appear in leaks.
As you can see Clerk is awesome, during this post we will see some of the features provided with a React example application.
Setup Clerk Application
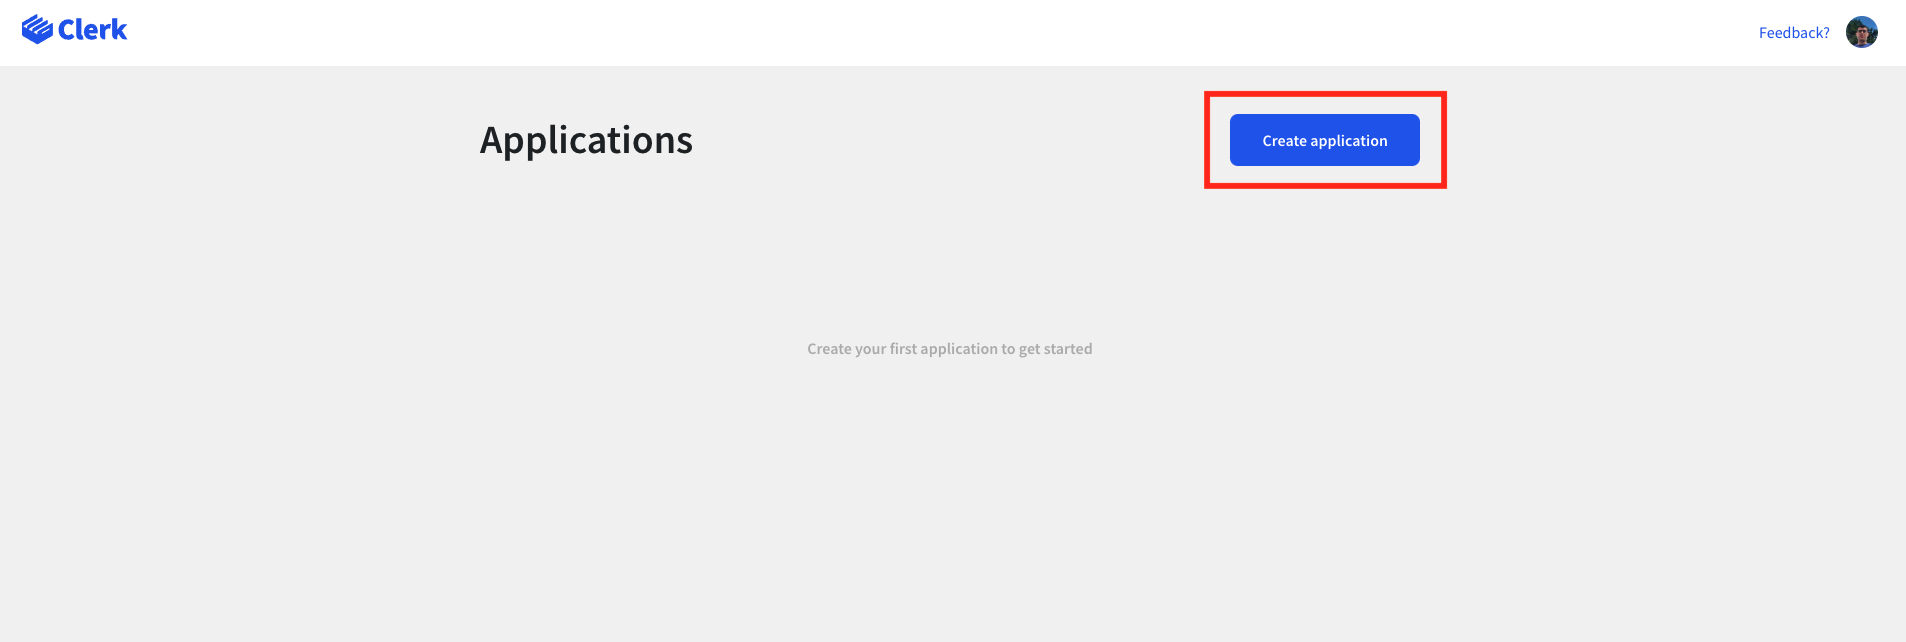
First of all, we need to create a Clerk account in the next link. After logged in we will see a dashboard with our apps, the next step is to select the "Create application" button.
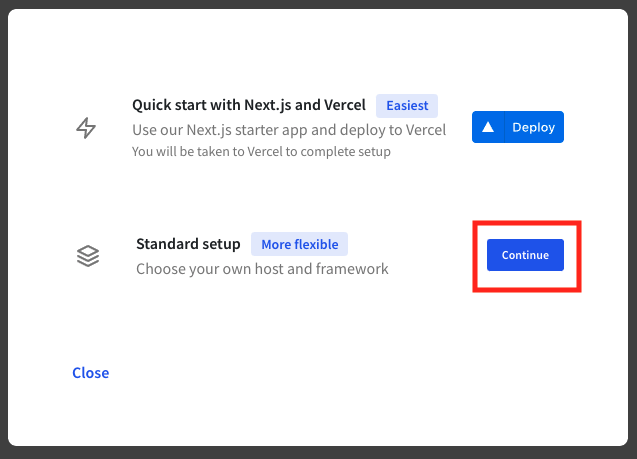
After that, a modal will be open showing us the Clerk setup options. There are two options:
- Quick Start with Next.js and Vercel: Easy to set up a Next.js project with some default options provided by Clerk.
- Standard Setup: Setup customizable, can choose several options that Clerk provide and need to integrated step by step.
For the case of this example will be used Standard Setup.
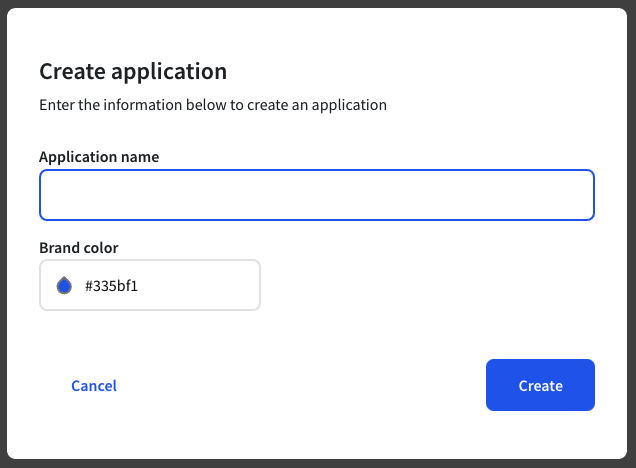
The next step will be to fill in some options related to our application as the application name and the brand color. The branch color is used as a reference by the different components provided by Clerk.
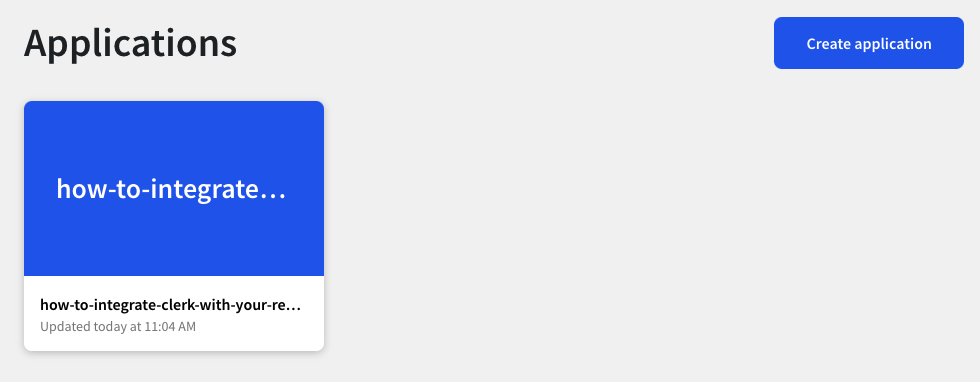
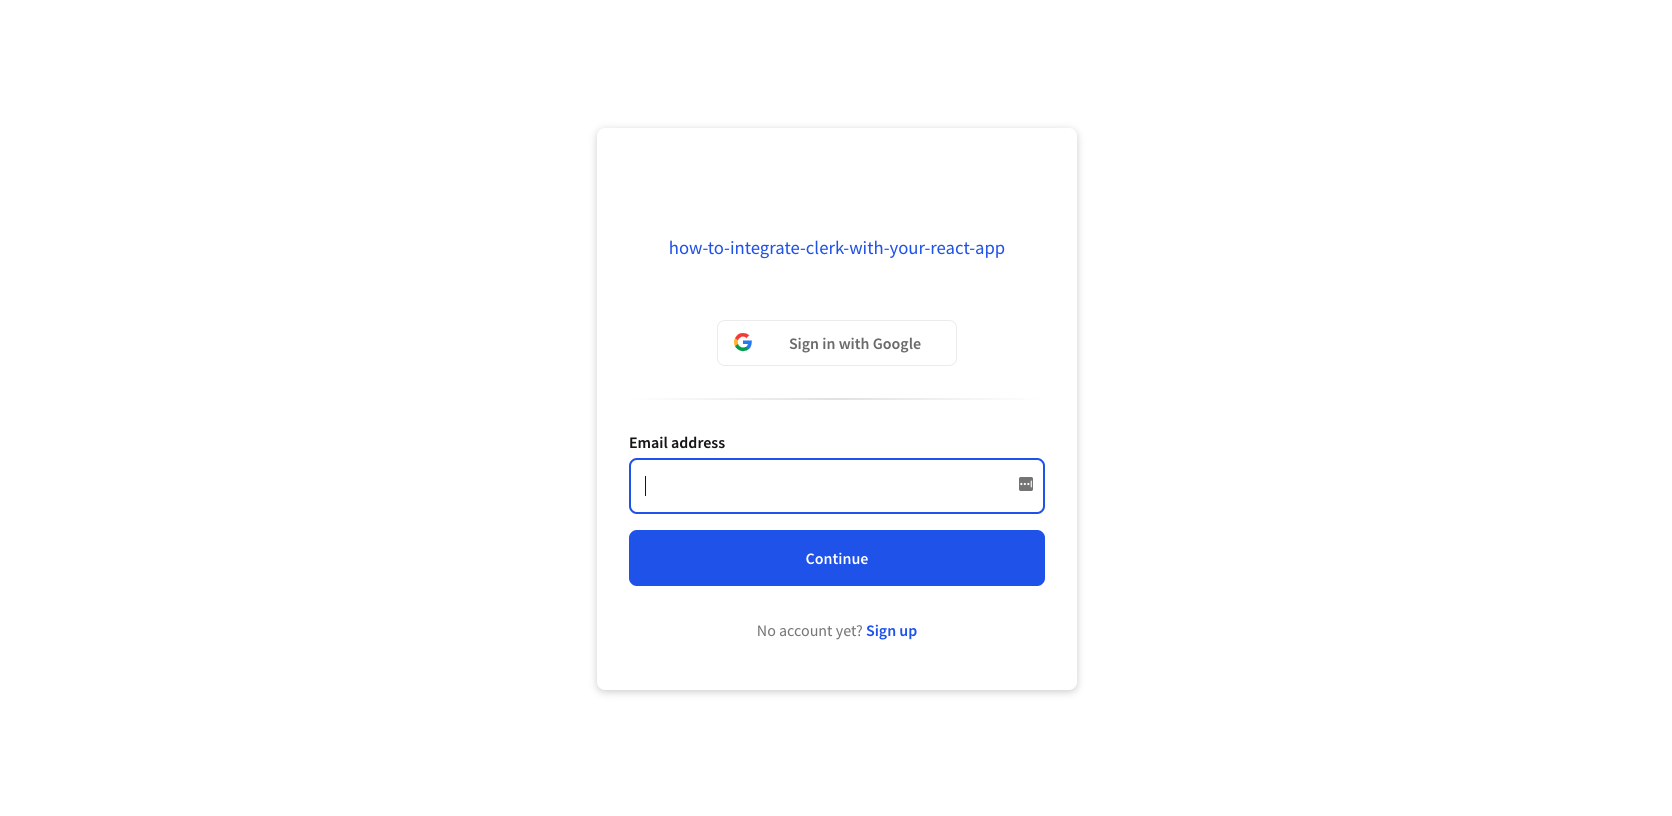
After that our application will be created and will be displayed on the Clerk main page. For the case of this example, I used how-to-integrate-clerk-with-your-react-app.
Once we select our application we can start to set up our project and rules related to Clerk. As you can see Clerk provides development and a production environment that can be used in our project. For now, we will select Development.

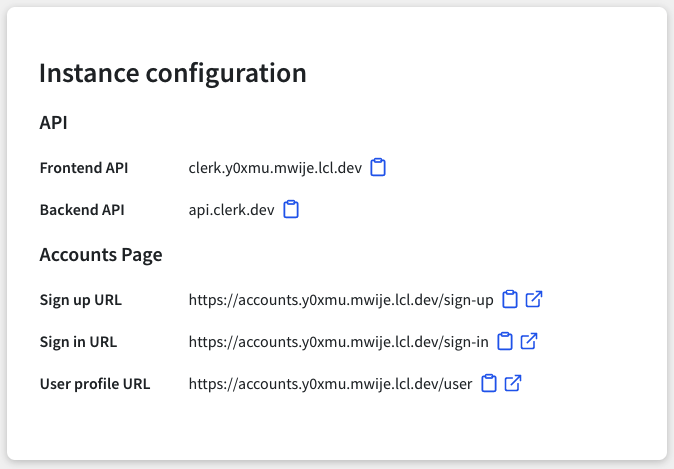
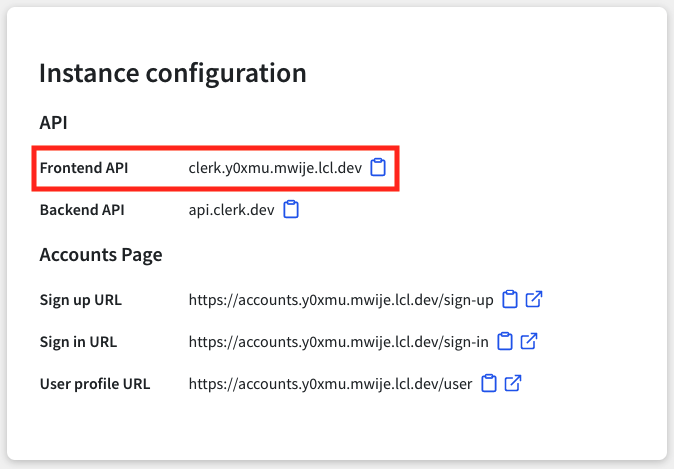
After selecting the Development mode we need to find our instance configuration settings that will be used to integrate our React application with Clerk.
Setup the React Application
First of all, we need to create our React application
npx create-react-app clerk-app
Install Dependencies
For the case of this example, we need to install some dependencies to integrate clerk with our React application. First of all, we need to be install the Clerk's npm package for React with the next command
npm install --save @clerk/clerk-react
Also in this example, we will be using react-boostrap npm package for the UI and some styles so we need to install it with the next command.
npm install --save react-bootstrap bootstrap@4.6.0
As React-Bootstrap doesn't depend on a very precise version of Bootstrap, so we need to import the bootstrap styles in our index application file.
import 'bootstrap/dist/css/bootstrap.min.css';
Code
constants.ts
In the case of this file, we will use to have all the settings and constants that we need for our application.
export const CLERK_FRONTEND_API = "clerk.y0xmu.mwije.lcl.dev";
export const GET_POST_URL = "https://jsonplaceholder.typicode.com/posts";
CLERK_FRONTEND_API: This is provided by the Instance configuration settings provided by Clerk.
GET_POST_URL: For the case of the example we will use JSONplaceholder.
Note: For the case of this example we have used constants, however in the case of your project use environment variables will be the best approach for that.
App.tsx
import React from "react";
import {
  ClerkProvider,
  SignedIn,
  SignedOut,
  RedirectToSignIn
} from "@clerk/clerk-react";
import { CLERK_FRONTEND_API } from "./constants";
import Header from "./Header";
import Home from "./Home";

const App = () => (
  <ClerkProvider frontendApi={CLERK_FRONTEND_API}>
    <SignedIn>
      <Header />
      <Home />
    </SignedIn>
    <SignedOut>
      <RedirectToSignIn />
    </SignedOut>
  </ClerkProvider>
);

export default App;
The first thing that we need to focus on is that Clerk requires every page to be wrapped in the context and also we are passing the CLERK_FRONTEND_API to the ClerkProvider.
Another aspect is that the Home page is wrapped by the SignedIn Clerk component. Basically with that, the Home page will be displayed just in case the user logged in to the application.
Also in the case of logout, we are using the SignedOut Clerk component and passing another component as children, in this case, RedirectToSignIn that will produce that when the user logged out will be redirected to the sign-in page.
Header.tsx
import { UserButton } from "@clerk/clerk-react";
import React from "react";
import { Navbar } from "react-bootstrap";

const Header = () => (
  <Navbar bg="dark" variant="dark">
    <Navbar.Brand>Clerk Example</Navbar.Brand>
    <Navbar.Toggle />
    <Navbar.Collapse className="justify-content-end">
      <Navbar.Text>
        <UserButton />
      </Navbar.Text>
    </Navbar.Collapse>
  </Navbar>
);

export default Header;
This is the navbar of our application, however as you can see we are using the UserButton Clerk component that will display at the end of the navbar a button with the logged user that can be used to log out or manage their account.

Home.tsx
This Home file will contain all the main content related to our home page. In this case, as I mentioned before we will use JSONplaceholder to retrieve some fake information that will be displayed on our page.
import React, { useEffect, useState } from "react";
import { Card, Col, Container, Jumbotron, Row } from "react-bootstrap";
import { useUser } from "@clerk/clerk-react";
import { GET_POST_URL } from "./constants";
const Home = () => {
const { fullName } = useUser();
const [posts, setPosts] = useState([]);
useEffect(() => {
const fetchPosts = async () => {
try {
const data = await fetch(GET_POST_URL);
const postsFetched = await data.json();
setPosts(postsFetched);
} catch (error) {
console.error(error);
}
};
fetchPosts();
}, []);
return (
<Container fluid className="mt-4">
<Row>
<Col>
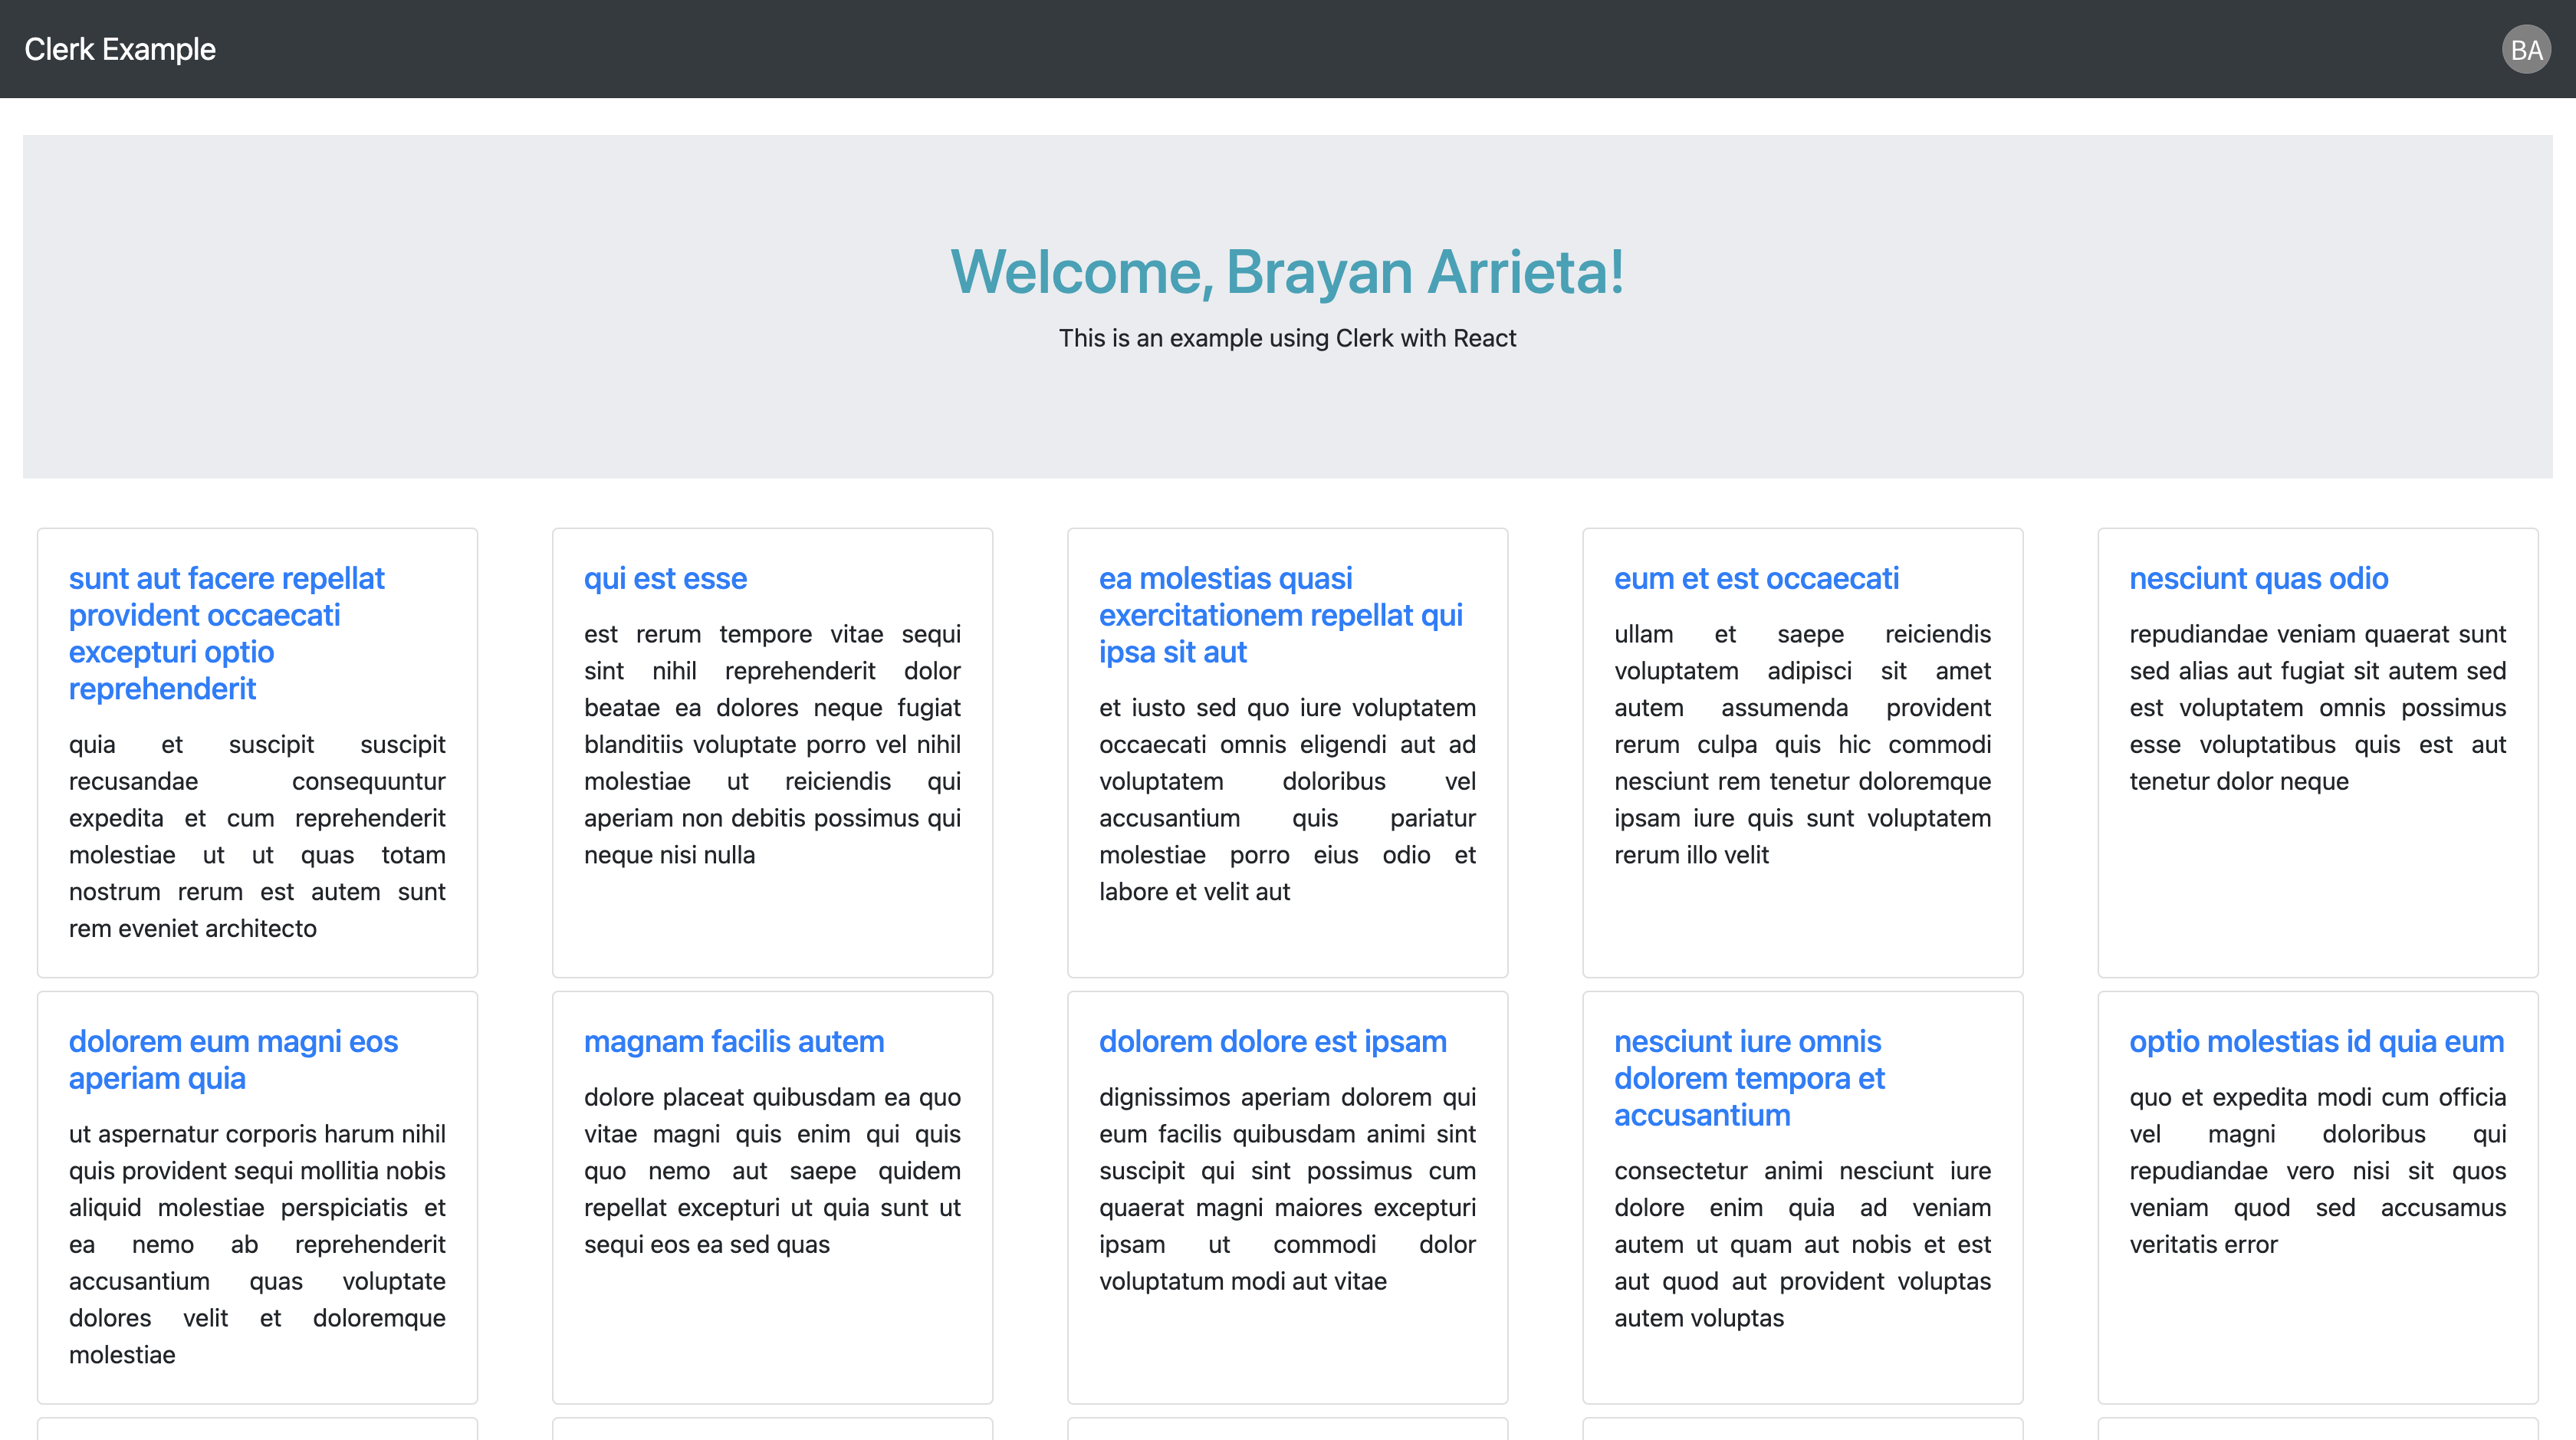
<Jumbotron fluid className="text-center">
<h1 className="text-info">Welcome, {fullName}!</h1>
<p>This is an example using Clerk with React</p>
</Jumbotron>
</Col>
</Row>
<Row>
{posts.map((post) => {
const { title, body, id } = post;
return (
<Col key={id} className="d-flex justify-content-center mb-2">
<Card style={{ width: "18rem" }}>
<Card.Body>
<Card.Title className="text-primary">{title}</Card.Title>
<Card.Text className="text-justify">{body}</Card.Text>
</Card.Body>
</Card>
</Col>
);
})}
</Row>
</Container>
);
};
export default Home;
Probably the most important thing to focus on is that we are using the useUser hook provided by Clerk to use the user data to display the message Welcome, {fullName}!. For this case, we just have used the full name, but there are several pieces of information related to the user that can be used.
The example can be accessed by the next URL https://nioxw.csb.app/ the first thing that we will see when the webpage is loaded is the login page where we can create our account or login into the application.
All the code related to this example is in this repository and also can be edited in the next CodeSandbox.
Conclusion
Clerk is an awesome tool that will allow us to add sign-up, sign-in, and profile management to your application in minutes, as you see during this post we explore some of the basic features of Clerk that you need to start with an application, so don't be afraid to put it into practice you learned it.
I will be writing the second part of this post, there are some other features of Clerk that we will explore in the next post as routing, customization as others.
Let me know in the comments recommendations or something else that can be added, I will update the post based on that thanks! 👍


